
Monday, July 15, 2019
Tuesday, July 9, 2019
Flipgrid AR

What is Flipgrid AR?
What do I Need To Install?
Steps


3) Open the Flipgrid Mobile App and locate/press the icon that looks like a small QR code to the left of "Enter a Flip Code".
 |
| FlipGrid Mobile Phone App |
4) A built-in Flipgrid QR code reader will launch. Point the reader at the code(s) until it fills the small code reader box. The border of the reader will turn green when it reads the code.

5) The AR video will automatically begin playing. Note that the video doesn't need to use a dedicated "player". It will play through Flipgrid without the need for a secondary product.
That's it! You're now viewing videos in augmented reality! As you move your phone around the room, the video will appear to 'float' on top of whatever is in the camera viewfinder! That's augmented reality.

Wednesday, July 3, 2019
Hypothes.is

What is Hypothes.is?
"The Hypothes.is Project is a new effort to implement an old idea: A
conversation layer over the entire web that works everywhere, without
needing implementation by any underlying site. Using annotation, we enable sentence-level note taking or critique on
top of news, blogs, scientific articles, books, terms of service, ballot
initiatives, legislation and more. Everything we build is guided by our principles. In particular that it be free, open, non-profit, neutral and lasting to name a few." (Retrieved from http://hypothes.is)
How Does it Work?
There are actually a number of ways Hypothes.is can be used, including creating a custom "group" on the Hypothes.is web site. But we've made it easier by installing it into Canvas so that faculty and students can annotate directly inside a course site without having to create an Hypothes.is account. Once enabled, faculty can create annotation assignments for content pages they've uploaded.
Using Hypothes.is in Canvas
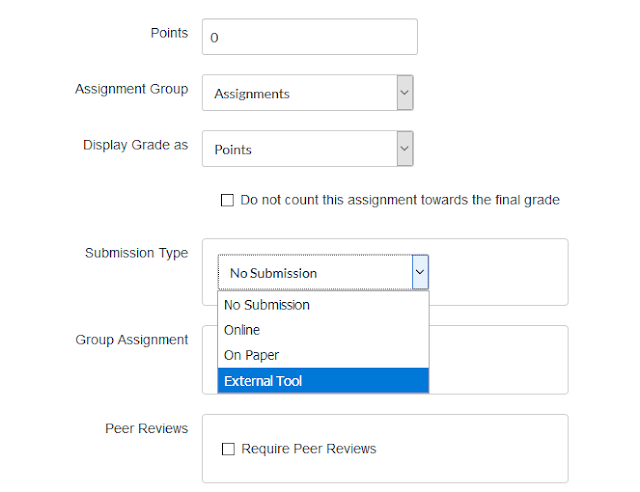
Step 1: Hypothes.is is an external Tool in Canvas. Depending on whether this annotation activity will be graded or not, set up a discussion, assignment, or stand-alone course page. Below I created an assignment and I selected External Tool as the submission type.
Step 3: Once authorized you will see a file picker option. You have two options: Google File Picker or Canvas Files. If using Canvas files they must be in an editable PDF format.
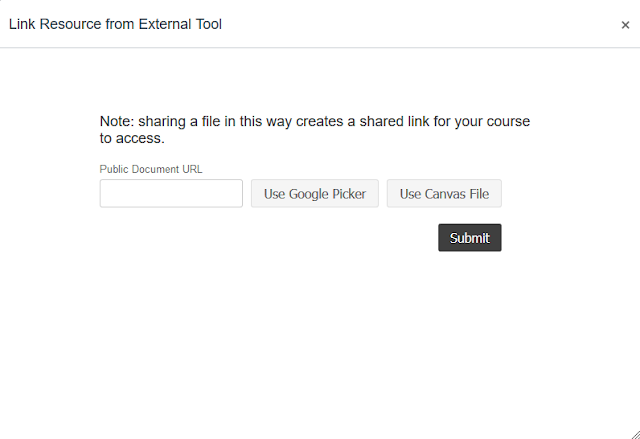
Step 4: Here I clicked the Canvas File option and selected the only PDF file I have uploaded to this course. The file must reside in the Canvas Files.

Step 5: When the file loads into Canvas you will see the Hypothes.is toolbar to the right. It slides left and right. Below is the "closed" option, followed by the "open" option.


Step 6: Hypothes.is presents four options:
To annotate, simply highlight the desired text block. An annotate tool will automatically appear. When the annotation is associated with the text block, it will appear in the lower right, along with an annotation bookmark for easy reference. Again note that the PDF MUST be in an editable format. A PDF image file (non-editable) will not work.

Step 6a: The highlight tool works the same way as the Annotate tool, but allows the user to highlight a text block for a notation. You can show/hide highlight by clicking the small eye icon.

Step 7: Here you can see what an annotation looks like. The annotation appears below the highlighted text block. Users have the option of making the annotation public to the course participants, or private to themselves. Users can also reply to other annotations.

Since I created this as a graded assignment, I can review each student's annotation and add the appropriate grade using SpeedGrader.
Subscribe to:
Posts (Atom)