
The Accessibility Ribbon brings together in one place all the tools you need to make your presentation accessible. The new ribbon complements the Accessibility Checker, which automatically alerts you to many of the common accessibility issues found in PowerPoint presentations.
With the Accessibility Ribbon, you can access the tools needed to fix accessibility issues that arise as you’re working on your presentation. (If you are already using the Accessibility ribbon in Excel, you’ll find that the Accessibility Ribbon in PowerPoint works in a similar way.)
How it works
- Click Check Accessibility on the Review tab to open the Accessibility pane, and notice that the Accessibility ribbon appears automatically when the pane is open.
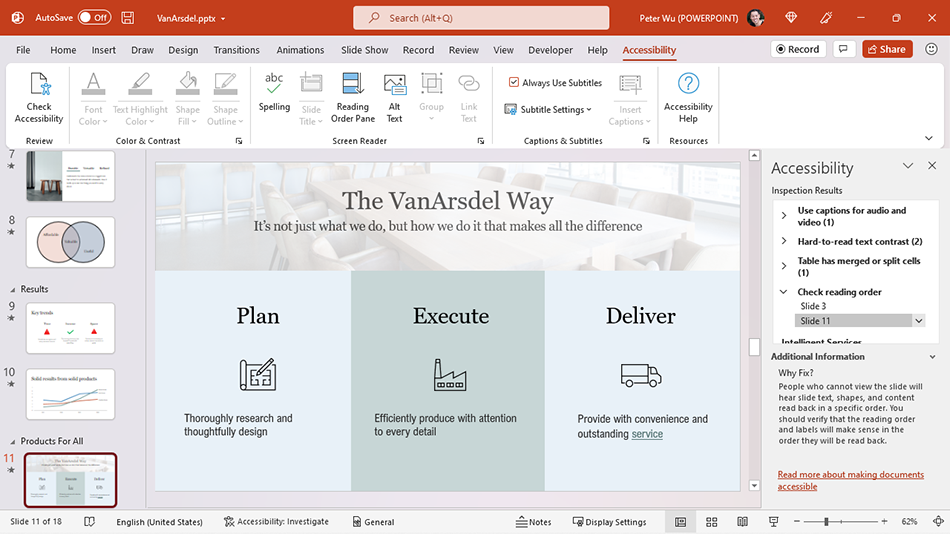
- Use the different tools and options in the Accessibility Ribbon to address any issues that the Accessibility pane has identified.
Scenarios to try
- Click the Slide Title button to add a title to your slide, or to edit the title that’s already there. Or select a text box that you want to use for the title and click Slide Title to make it the title.
- Illustrations and diagrams consisting of multiple objects are easier for screen-reader users to understand if they are grouped together (and include a description in the alt text). Select the objects and click Group > Group, then click the Alt Text button to add a description.
- Captions allow people who are deaf or hard of hearing to participate in your presentation. Turn on live captions and subtitles before you present.
Tips and tricks
- Before sharing a presentation with someone else, saving it to a public location, or presenting, be sure to first check for any accessibility issues and fix them using the Accessibility ribbon.
No comments:
Post a Comment
Note: Only a member of this blog may post a comment.